The effort of loading up a ton of equipment is rewarded with the peaceful and tranquil atmosphere that kayaking can bring when done on your own.
If you go solo kayaking, you are responsible for lugging your kayak from one place to the next.
What is a way to transport a boat that is between 50-100 lbs and is 2-3 times longer than your body without straining your back?
Before attempting to lift and move a kayak by yourself, it is important to consider the route in advance. Think about obtaining tools like a grip handle, kayak framework or trolley, to make the task simpler.
Utilize an efficient means to hoist your kayak onto your shoulder or car top rack. Maintain a positive attitude and don’t take on too much.
Plan before you lift and carry your kayak
When making arrangements for your kayak excursion, think of when you will have to pick up and tote your kayak.
What is the maximum height and distance you need to move your boat?
Generally, one needs to take their kayak out of the water and move on land four times, though in certain cases, it could be more.
From storage to your vehicle.
If you have a hardshell kayak, the first step is taking the boat from where it’s stored (eg. garage, shed, backyard, basement) and loading it into your car.
Your next step, when you get to your car, is to put the kayak in its place and tie it securely to the roof rack, cargo box, or trailer.
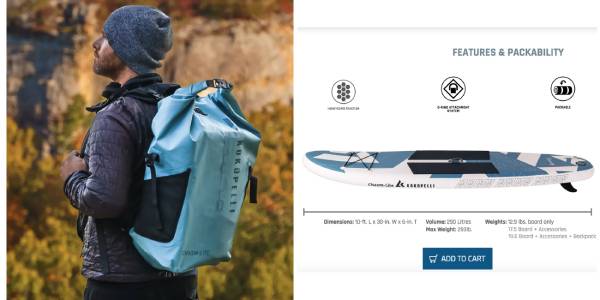
If you are using an inflatable kayak, just lift the bag which holds the boat into the trunk of your vehicle. The convenience of transporting an inflatable boat is definitely a plus.
From your vehicle to the water.
This distance could be 20’. It could also be more than one mile.
Examine the path in advance of transporting your kayak, especially if the journey is lengthy.
Keep an eye out for potential dangers on the floor or in the sky that could stop your progress. Are there roots or fallen trees to trip over? Are there steep, muddy inclines?
Checking beforehand can demonstrate if it is possible to utilize a kayak cart, in case that is a preference you would like to carry out.
Ensure you have enough space around your car to either take off your rigid kayak from the rooftop holder or to inflate your inflatable vessel on the ground.
If your intention is to inflate a kayak, it is essential that the area you choose for the process is free from any vegetation, such as thistles, cacti, and debris, such as broken bottles.
From the water to your vehicle.
This step is quite similar to the previous one, but needs to be done in the reverse order. There might, however, be exceptions.
For instance, if you are sea kayaking and the tide has either ebb or flow, then your origination or departure place could vary due to the water level being higher or lower. You could have started swimming in a sandy area, but you will likely have to battle through weeds or coral to get out.
It’s also possible that if it has been storming or any other harsh conditions, the path to your car could have become more difficult.
If you had a blow-up kayak, you would need a lot of open space to deflate it and let it dry in the sun (as it’s always sunny when you go kayaking, isn’t it?).
It is not advisable to pack and keep a kayak which is both drenched and can be blown up.
From your vehicle to storage.
Simply reverse everything in Step 1.
If you have been paddling an inflatable kayak and cannot make sure it is completely dry on the spot, it would be helpful to open it again and let it dry out for an extended period of time.
Portaging with your kayak.
Yes, some people actually do this. One could argue that the highlight of a kayak journey where portaging is involved is the completion of the portage.
The necessity of mapping out the route of a portage depends on the kind of journey one is undertaking.
Examining the path of your water-based journey is particularly crucial when you are paddling solo. Portages rarely occur on flat surfaces. Your visibility when carrying a kayak on your shoulders is usually diminished.
It would be wise to become familiar with the area before carrying your supplies and a kayak on your back.
Choose the right gear to help you lift and carry
Kayaks can weigh anywhere from 40-100lbs. Certain companies which deal in sports equipment create and distribute equipment to facilitate the endeavor of using one’s own strength to convey a kayak.
Kayak carry straps
Sit-on-top kayaks can be lifted and transported with the help of kayak carry straps. They thread through your drainage openings and then drape over one of your shoulders.
You can buy special straps that go under the base of a kayak so you can easily transport a sit-in kayak just like the way you would with a sit-on-top one.
The shoulder straps that are used to carry these types of kayaks are light, however, the typical sit-on-top kayak is known for being very heavy. Tying your vehicle down with straps can be a useful method when your car is situated within 50 yards of a body of water. Despite this, wearing high heels is not a very useful choice when you have a lengthy journey ahead of you.
Kayak grab handle
Pulling a lightweight inflatable along the ground is an easy task. Dragging a heavy fiberglass kayak is another thing entirely.
A top-notch inflatable kayak is made to endure hard use. Provided you don’t drag it through a bed of drywall screws, it should be okay.
Fiberglass, however, is fussy. Even going a small distance while pulling can make the bottom of a glass vessel appear like the beginning point of a feline drag competition.
So, a grab handle is fine. Dragging your kayak a very short distance is acceptable. Dragging a fiberglass kayak anywhere is moderately punishable.
Kayak yoke
If you don’t mind feeling a bit of suffering and distress while paddling your kayak, then you should consider portaging.
The only effective method of carrying a kayak alone is to use a kayak yoke. Period.
A yoke is a device that assists you in transporting a boat on your back. Essentially, it is a flat piece of wood that is positioned on the back of your shoulders, with a gap made to go around your neck.
You can use a yoke to secure your kayak to your shoulders and carry it in any direction you desire.
If you plan to carry a kayak over land, you need to use a special yoke designed for kayaking. Without proper care, one is subject to wasting time, suffering physical harm, and a rapid decline of their faith.
It is possible for a kayak portage to be unsuccessful without the use of a yoke. Just use one.
Kayak Cart
When kayaking by oneself or with a group, a kayak trolley may be useful. If the area around your car and the water body is flat and wheeled carts are permissible, you may be able to protect yourself from a strained back by utilizing one.
In order to tow your kayak, find the center of balance at the rear, attach the cart, and then pull it along by the grip at the front.
After taking your vessel off the cart, you must either put it away in a safe place or take the cart with you (while risking that your kayak might disappear if you go back to your car).
It’s your decision.
Roof rack
The kind of roof rack you have tells you how to lift your kayak.
You may attach a load assistance tool to the back of your existing roof rack which allows you to place your kayak on the rack without damaging the rack or the kayak.
How To Lift A Kayak By Yourself
Step 1: Preparation
Stand with your yak on the floor, with you facing it, and have the bow pointing in the course of your journeying. If the front end of the kayak is on your right side, you will be bearing the weight of it on your left shoulder, and if the bow is on your left side, the kayak’s load will be shifted to your right shoulder.
Tip the kayak over so that the cockpit is away from you. Raise it a bit to guarantee you’re in the midpoint of the yak; you would prefer not to make it uneven while it’s on one shoulder! It can be beneficial to know how to lift items even when you don’t have to, in case you don’t have access to a device that can help with the lifting.
Step 2: Use Your Legs
Grip the edge of the kayak’s cockpit with both hands, then raise it up onto your upper legs for support. At this stage, it’s crucial to flex your knees to avoid harm and provide the kayak with a steady resting spot on your legs.
Step 3: Roll Up
Bend your knees, keeping your back upright, and extend your arm closest to the back of the boat to grasp the lip of the boat with your fingers pointed upward and the boat facing you.
Lift the kayak off the ground and onto your shoulder, holding it in place with your hands to make it as comfortable as possible. Keep it balanced, take notice of how long it is, and watch out for any areas of oversight. A lift assist tool can potentially make it simpler to put a car onto the top of another car.
This video will provide additional guidance on how to accomplish it.
How 2 People Should Lift A Kayak
It is much simpler when another person helps to give you a ride. We’ve created a convenient instructional guide for the most reliable way of lifting a kayak with two people to ensure that you know how to do it properly.
There are two methods by which two individuals can transport an item. The ideal way to transport the vessel over shorter distances is for one individual to hold the toggle grasp handle at the bow and the other to hold the toggle at the stern.
Together they should pick the boat up off the ground and then go forward, all the while staying in communication and firmly keeping hold of the grab handles.
It will take two people to transport your kayak to your car, but if you are going farther, you will require a different style of movement. This is when a lift assist tool could be useful for putting a kayak on top of the car.
Step 1: Before You Lift
Grab a fellow kayaker. Stand side by side with your kayak on the ground, each of you facing the boat from either end.
Step 2: Lifting The Kayak
Once you and the other person are in position, bend your legs and ensure that your back is good posture. Grab the toggle closest to you. Be sure to talk to one another and make sure you and the other kayaker are in agreement.
When the two of you are prepared, carry the container together simultaneously. You and your partner should both have the kayak at the same level as your waists. Some types of devices which help in lifting may be of use if you are attempting to get a kayak on top of your car from this point.
Step 3: Kayak At Shoulder Level
It is essential to talk to one another to guarantee that the two of you feel secure and ready for this section. When you and your companion are good to go, heft the yak up and put it on your shoulder. You and your companion should each have one end of the kayak balanced on your shoulder.
This job makes it possible for you to fasten it to the roof of a car or carry it securely to the lake either with or without a lifting aid device. Be aware that the person leading should inform the follower of any impediments that may occur.
In Conclusion
As time progresses, you will become acquainted with the right way of doing something and it may eventually become something that you do without thinking.
Perhaps you have uncovered that utilizing a lift aid shelf or trolley with two wheeled components could be beneficial over expansive commutes.
It is necessary that you familiarize yourself with the guidelines and remain protected in every circumstance so you can take pleasure in your time spent cruising.